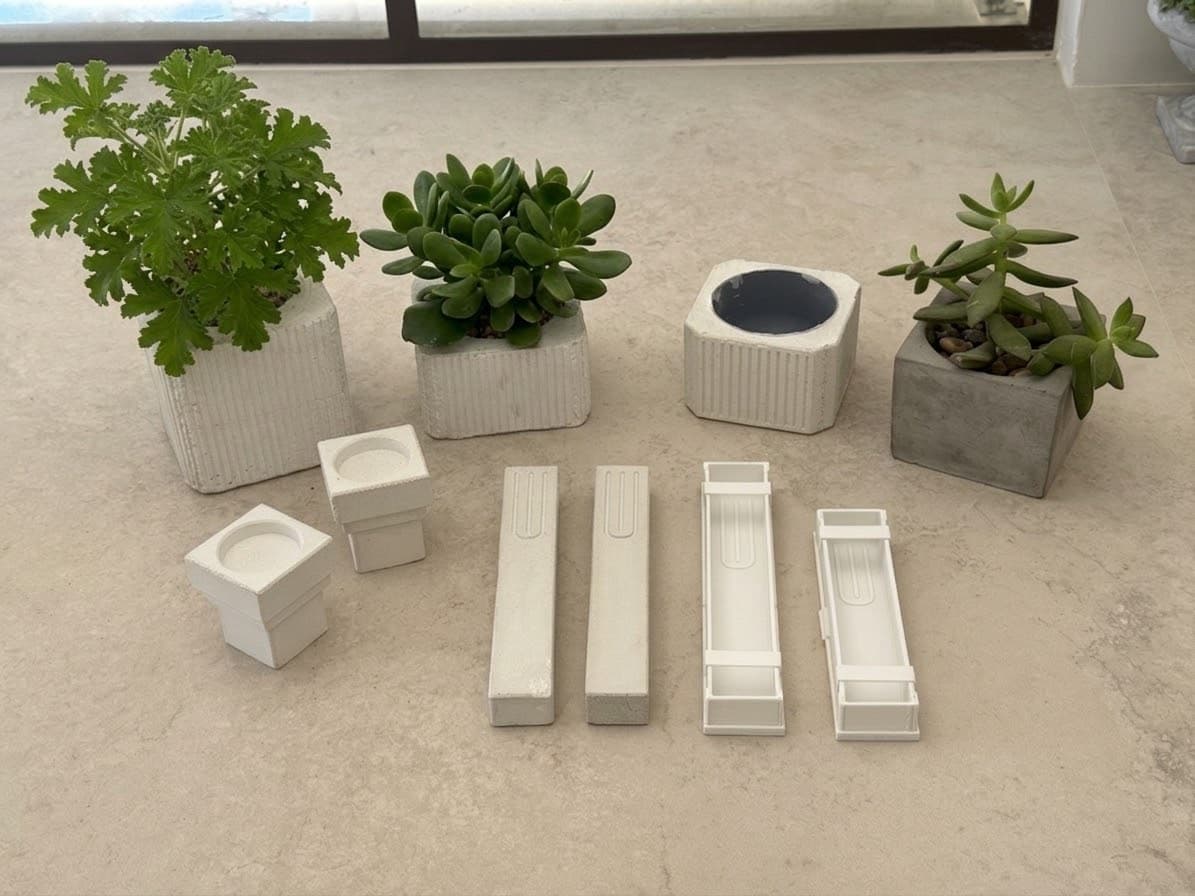
3D printing makes it possible to create concrete forms that would be difficult to build with traditional mold-making techniques. It also makes it easy to create a mold that looks great in CAD but is impossible to remove once the concrete hardens.
I learned these lessons by designing and pouring many concrete molds. Plenty of them failed, but each failure showed me something I could improve in the next mold.
The most important lesson is to design the finished object and the demolding process together. Every mold part needs to be assembled, held in place against the pressure of the concrete, and removed without damaging the finished piece.
This guide covers that entire process, from designing the mold to finishing the concrete.
#Designing the mold
#Design for assembly and demolding
I start by modeling the finished cast object, then design the mold around it. In Fusion 360, I use a hybrid model with a separate component for the finished object and for each part of the mold. This makes it easier to modify the object, inspect how the parts fit together, and plan the demolding sequence.
Before printing, decide how every mold part will go together and how it will come apart. Each piece should have a clear removal direction. Avoid undercuts or other shapes that mechanically lock the hardened concrete inside the mold. If a one-piece mold cannot be removed cleanly, split it into several parts.
Plan the seams and fastening points in CAD rather than improvising them after printing. Any seam that must be opened later should have a continuous flange with enough width for clips to grip securely. Place the flanges where you can reach them during both assembly and demolding. Flanges are not the only option - clear masking tape can also hold the mold parts together and seal the seams.
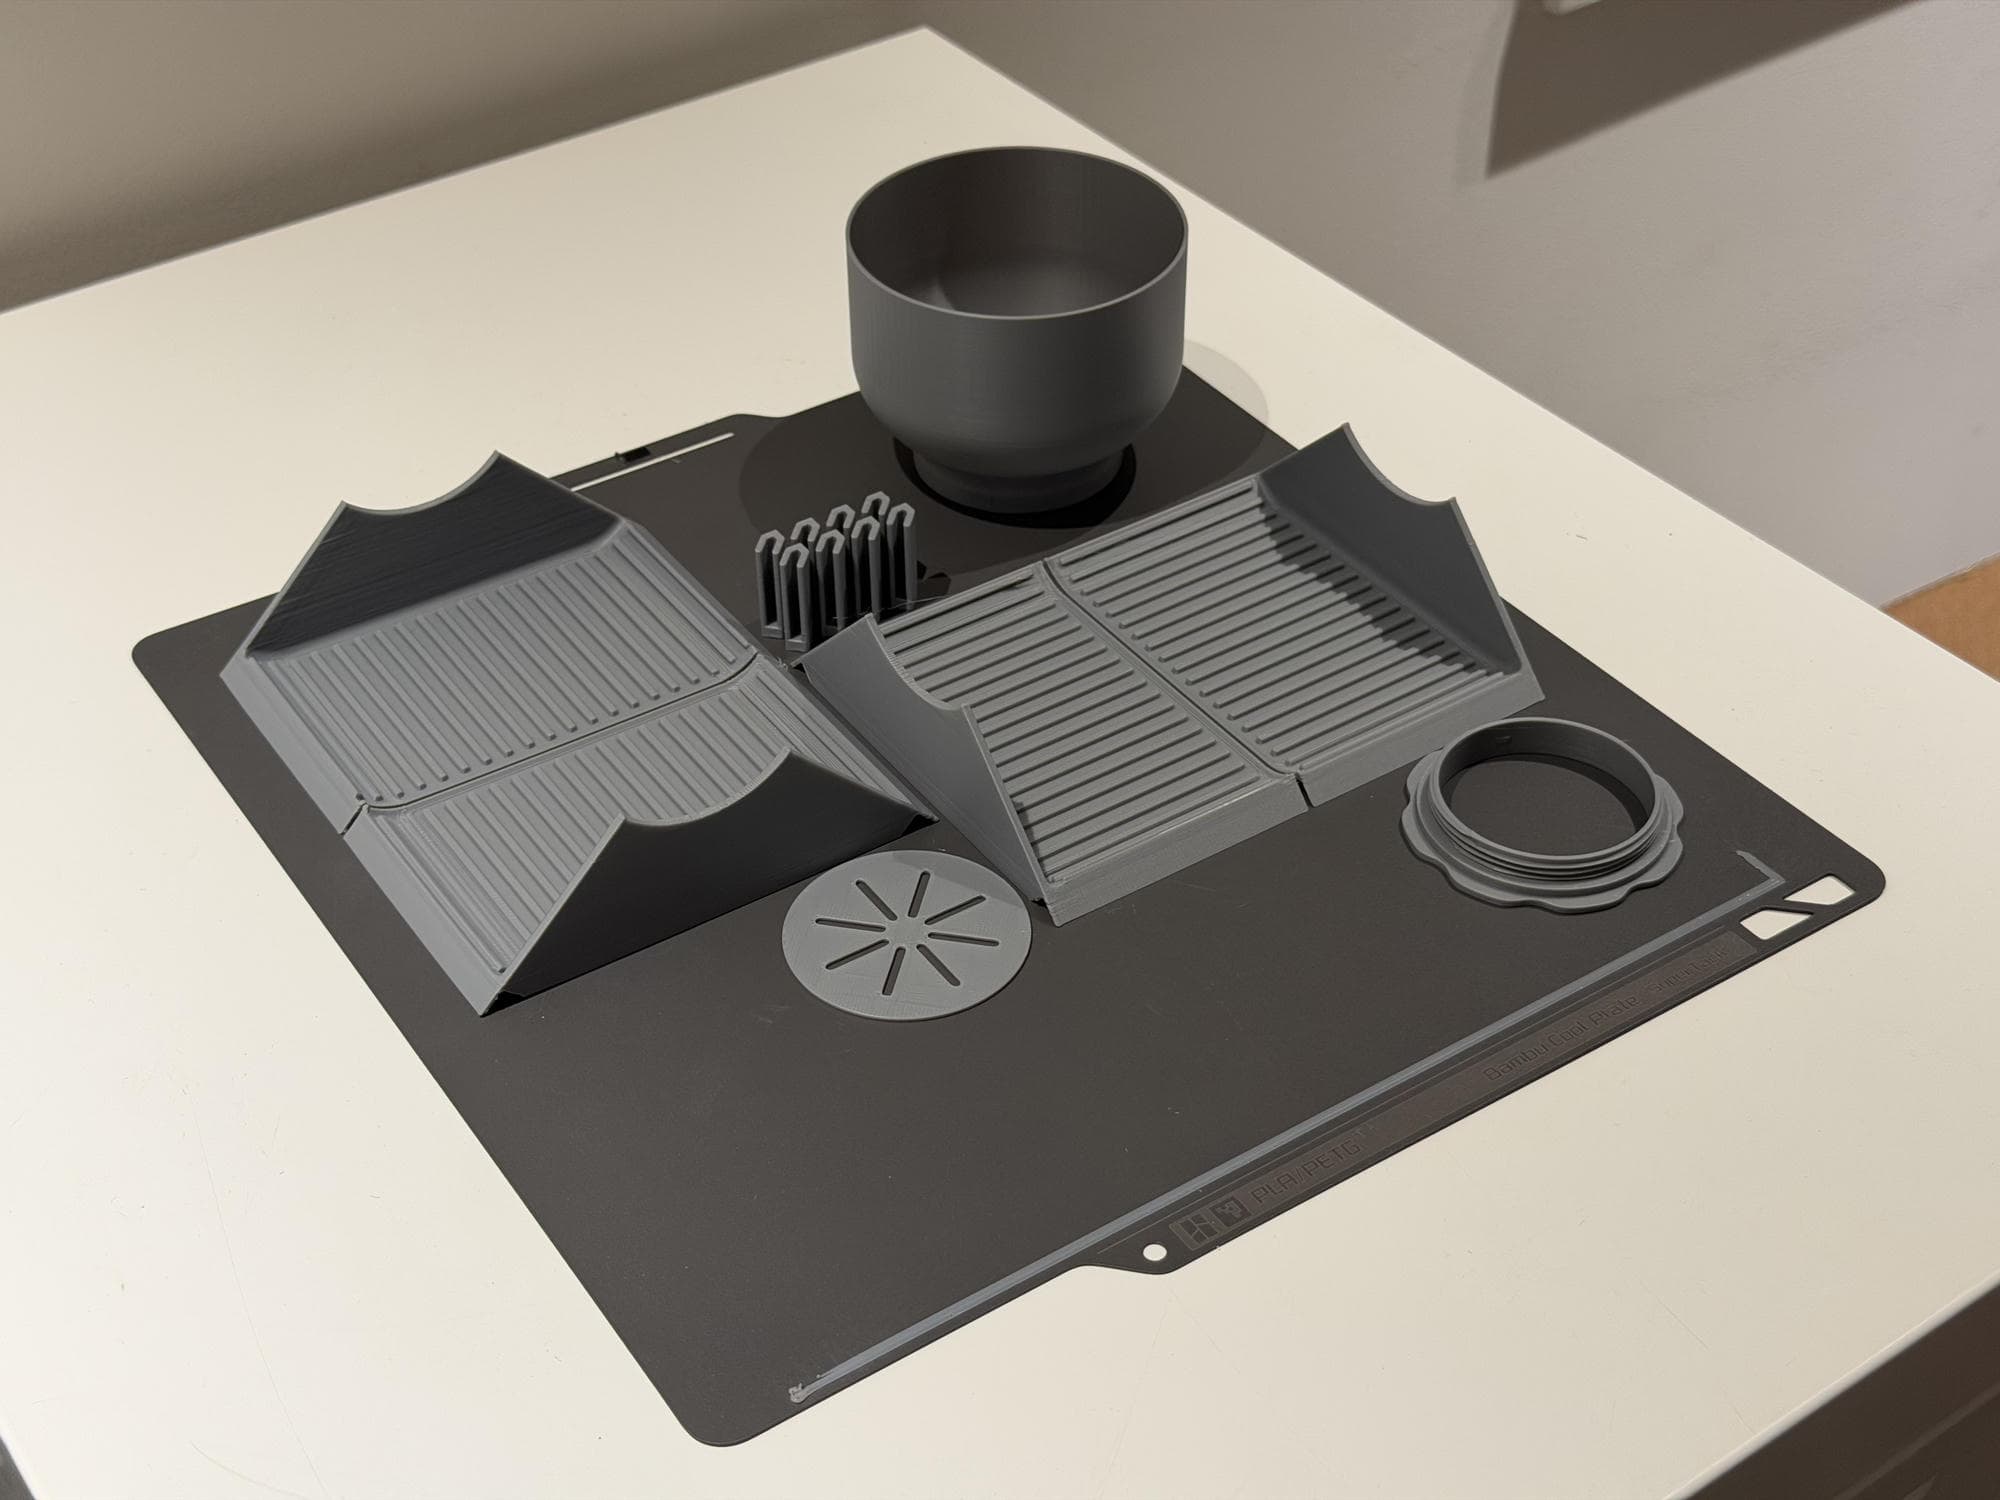
A multi-part concrete mold on the printer bed immediately after the print finished.
The concrete will push outward on the mold walls and upward on internal inserts. Make the walls and joints strong enough to resist those forces, and secure the assembled mold so that it cannot spread or separate during the pour. It can also creep between a wall and the base supporting it, then push the wall inward. Secure every wall in all directions rather than assuming the base will keep it in place.
#Use draft angles
Give every removable surface a slight draft, or taper, in its removal direction. An internal insert, for example, should be narrower where it enters the concrete and wider toward the end that will be pulled out. Even a small taper reduces friction and prevents the concrete from gripping the entire surface at once.
Do not rely on pulling a perfectly straight insert out of hardened concrete, especially if it has a large surface area. If the part still needs significant force after being loosened, the mold geometry probably needs to change. Layer lines on 3D-printed parts add friction and give the concrete more opportunities to grip the mold. Draft angles help overcome that friction, and a coat of oil reduces it further, as described in the next section.
#Secure and align internal inserts
An internal insert does not always need to be centered, but it does need a reliable way to align it. Attach it securely to the outer mold so that it cannot float upward, rotate, or shift out of position. Alignment pins, guides, and tabs can make its placement repeatable while also making the mold easier to assemble.
Think about both alignment and removal when adding these features. A guide that keeps an insert aligned can still become an accidental undercut that traps it after curing.
For my planter mold, I added a screw to the bottom of the insert. The screw fastens it to the rest of the mold and prevents the concrete from pushing it upward. During demolding, I can unscrew it from below before removing the mold.
#Consider permanent and sacrificial inserts
Sometimes the easiest mold part to remove is the one you do not remove at all. If an internal insert would be difficult to extract, consider making it part of the finished object or designing it to be broken away after the pour.
For a planter, a hollow printed insert can remain inside the concrete and become the container for the soil. For a mezuzah case, a plastic insert can stay in place and hold the mezuzah directly. This turns a difficult demolding step into a useful feature.
When a permanent insert is not appropriate, a sacrificial insert can create the same geometry and then be cut, dissolved, or broken into removable pieces. Choose the approach before designing the cavity so there is room to remove the debris without damaging the concrete.
#Avoid fragile concrete geometry
Concrete protrusions are much more fragile than recesses. Thin fins, sharp outside corners, and narrow projections can chip while the mold is being removed, even if the rest of the piece is strong.
Round exposed edges, add generous radii, or use a chamfer on thin and protruding features. Sharp recesses are generally less troublesome because they do not create a delicate piece of concrete that must survive demolding. When in doubt, make the finished concrete geometry rounded rather than sharp.
#Preparing, pouring, and demolding
#Prepare the mold
Clean the printed parts and test-assemble the complete mold before mixing any concrete. Check that the seams close tightly, the inserts are aligned, and all clips or fasteners are easy to reach.
Apply a thin, even coat of oil to every surface that will touch the concrete. It does not need to be a specialized mold-release product - I use canola oil, and it works well. A small painter's brush makes it easy to cover corners and details. Excess oil can pool and mark the finished surface, so brush out any visible buildup. Test the oil on a spare print if you are unsure whether it is compatible with the filament.
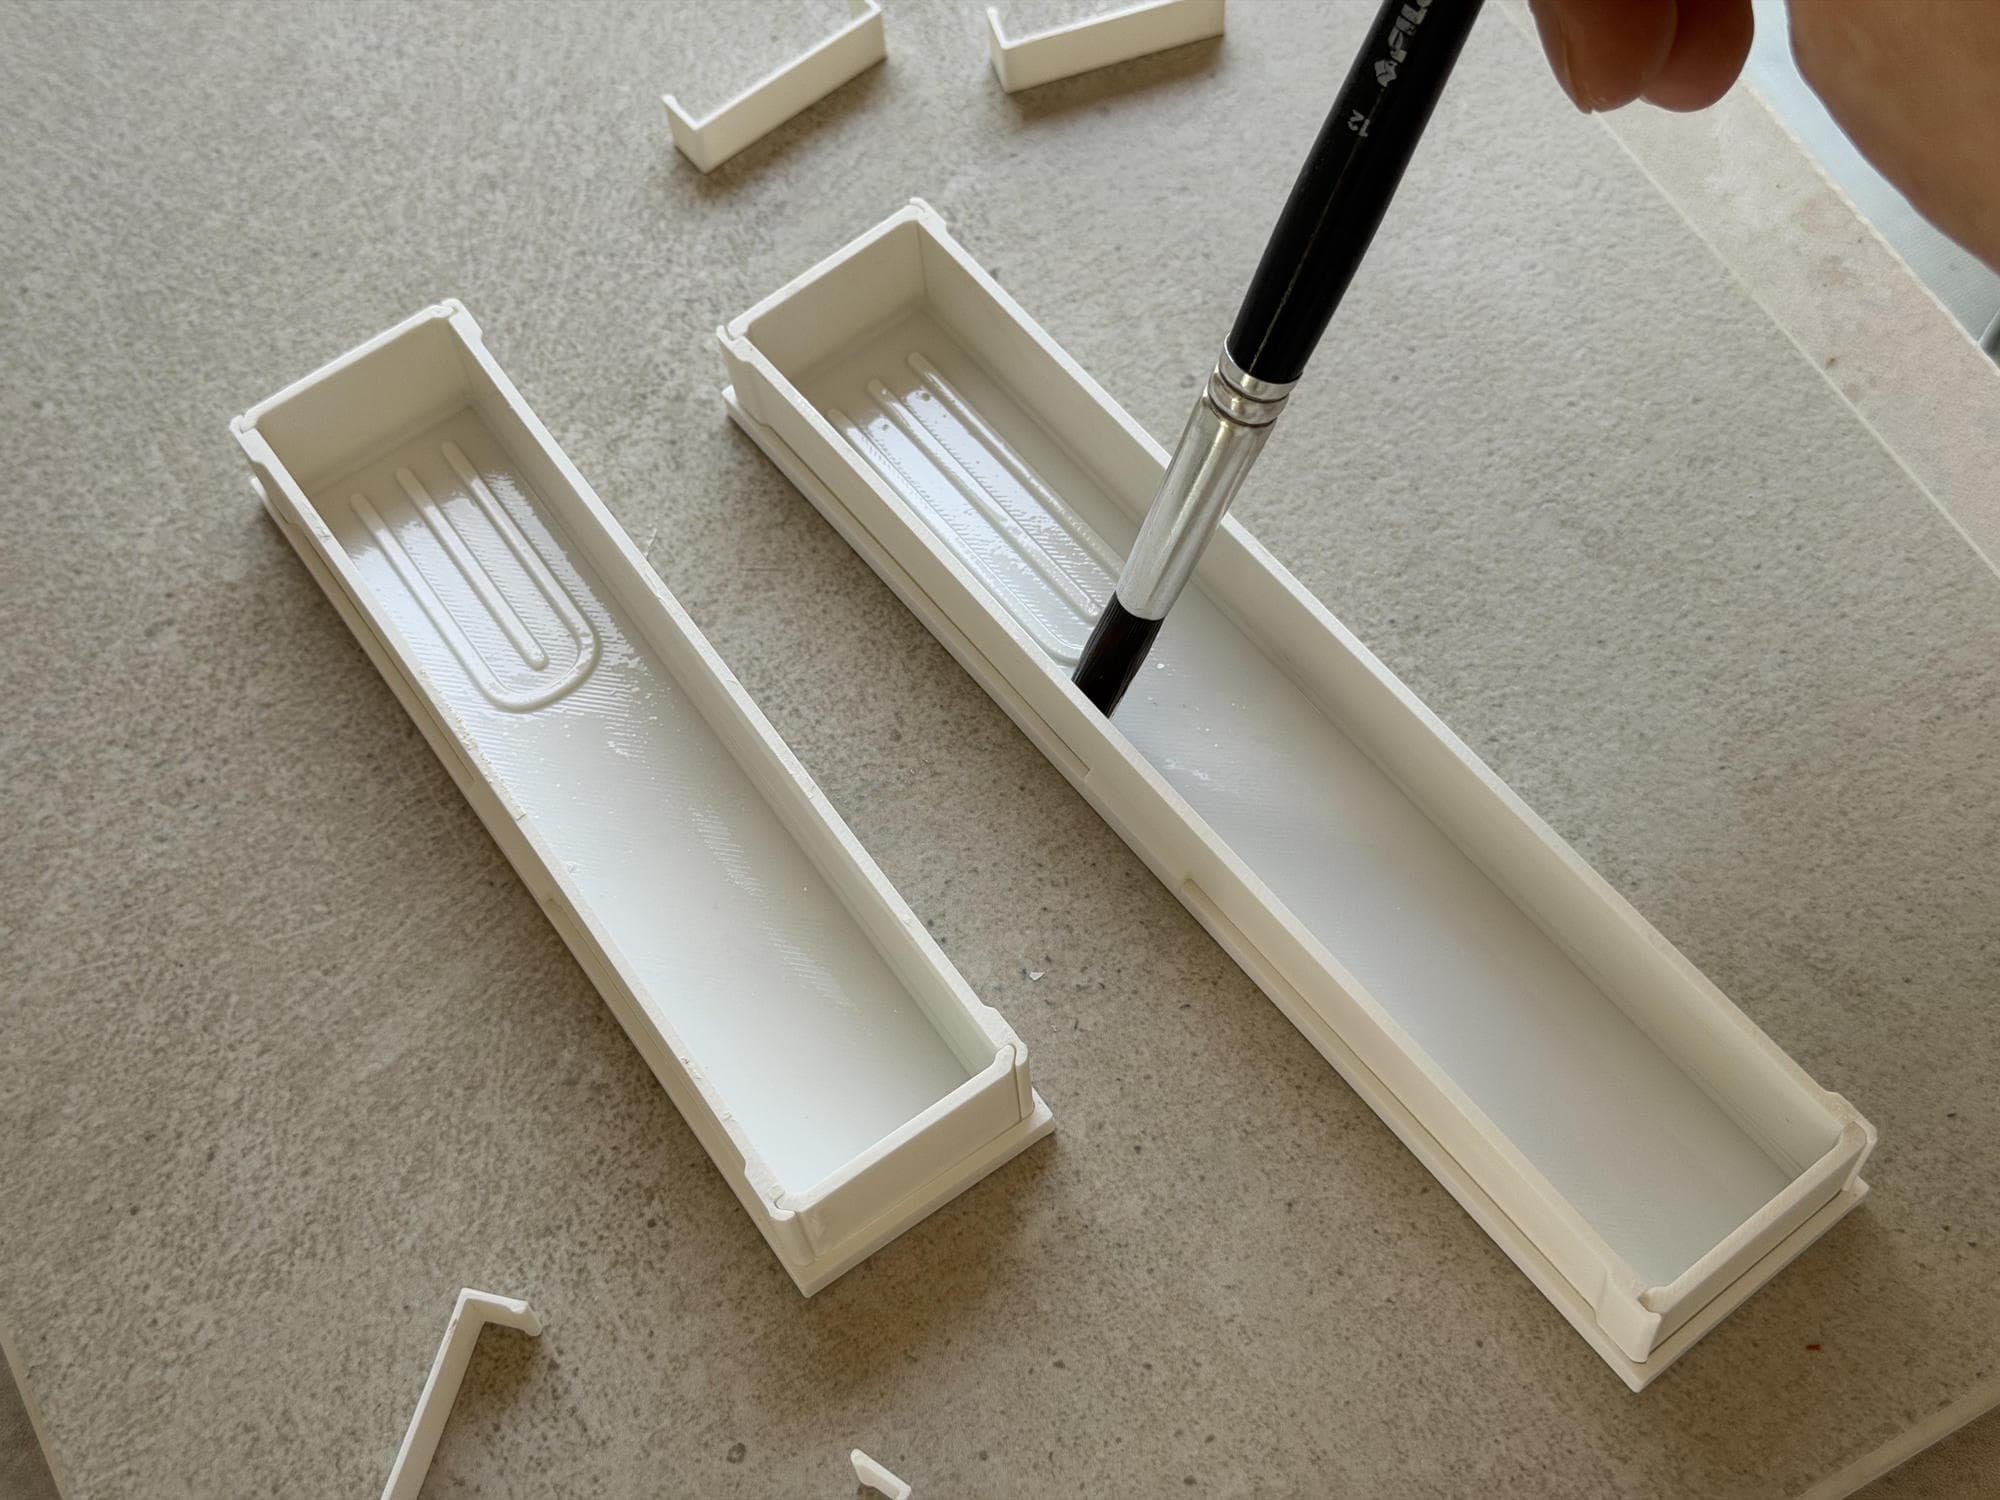
Brushing a thin, even coat of oil onto every mold surface that will touch the concrete.
Seal the assembled mold's seams with wax wherever possible. Cement paste and water can initially escape through even a narrow gap. The flow may stop as sand and cement particles pack the opening, but it can leave a visible seam with exposed aggregate on the finished casting. Press the wax into the outside of the joint so it blocks leaks without changing the cavity surface.
#Choose the mixture
The terms cement paste, mortar, and concrete describe mixtures with different ingredients:
- Cement paste contains only cement and water. It can capture fine details, but it shrinks more as it cures and is more likely to crack.
- Mortar adds fine aggregate, usually sand, to cement and water. The sand reduces shrinkage and cracking while still allowing the mixture to fill relatively small features.
- Concrete also contains coarse aggregate such as gravel. It is suitable for larger castings, but the aggregate may be too large for thin walls or fine details.
Choose a mixture whose largest aggregate can move freely through the narrowest part of the mold. For many small 3D-printed molds, mortar offers a useful balance between detail and dimensional stability. Whichever mixture you use, follow its specified proportions and curing instructions.
Mix calculator
1 part cement : 3 parts sand
- cement
- 1.86 tablespoons
- sand
- 5.58 tablespoons
Estimates use dry ingredient ratios by volume and include 10% extra for spills and waste. Gram amounts use typical loose bulk densities and may vary by product. Water is not included - follow the product instructions and add it gradually.
#Mix the concrete consistently
Use a mechanical mixer rather than mixing by hand. A drill fitted with a 3D-printed mixing paddle works well and produces a much more uniform mixture. Make sure the paddle is strong enough for the thick mix and that it cannot come loose while spinning.
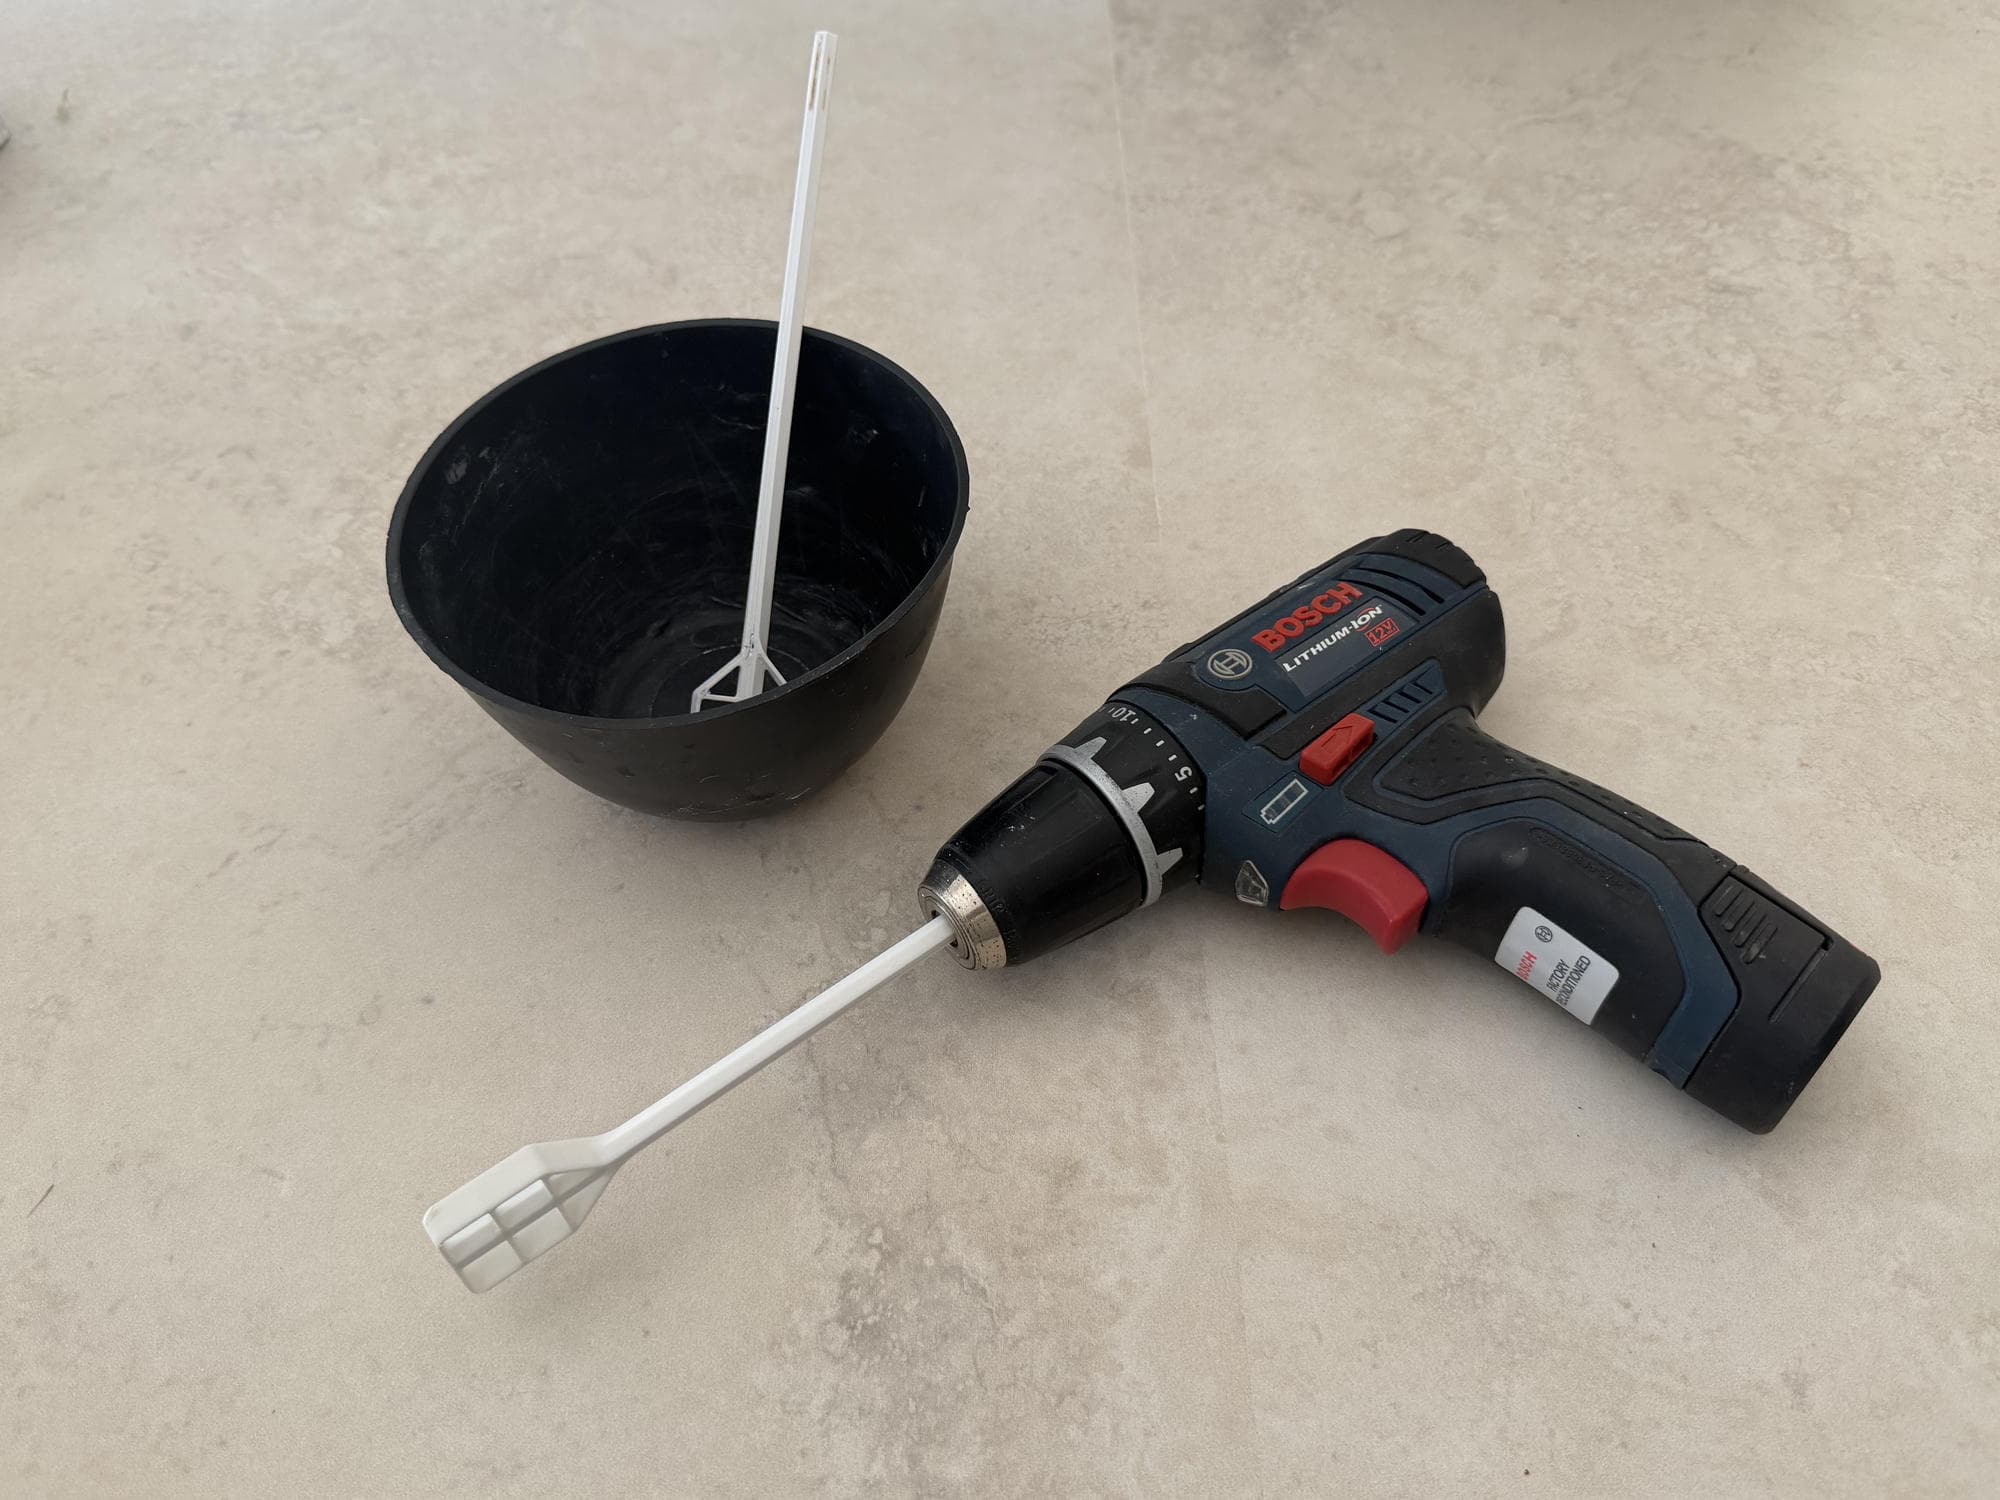
A Bosch drill fitted with a 3D-printed stirrer for mixing small batches of concrete.
Add water gradually and follow the proportions recommended for your concrete mix. The mixture should be thick and cohesive rather than runny. It needs enough water to combine and flow into the mold, but it should not freely drip when the mixing container is tipped. Too much water can weaken the finished piece, increase shrinkage, and cause the sand to settle at the bottom instead of remaining evenly distributed.
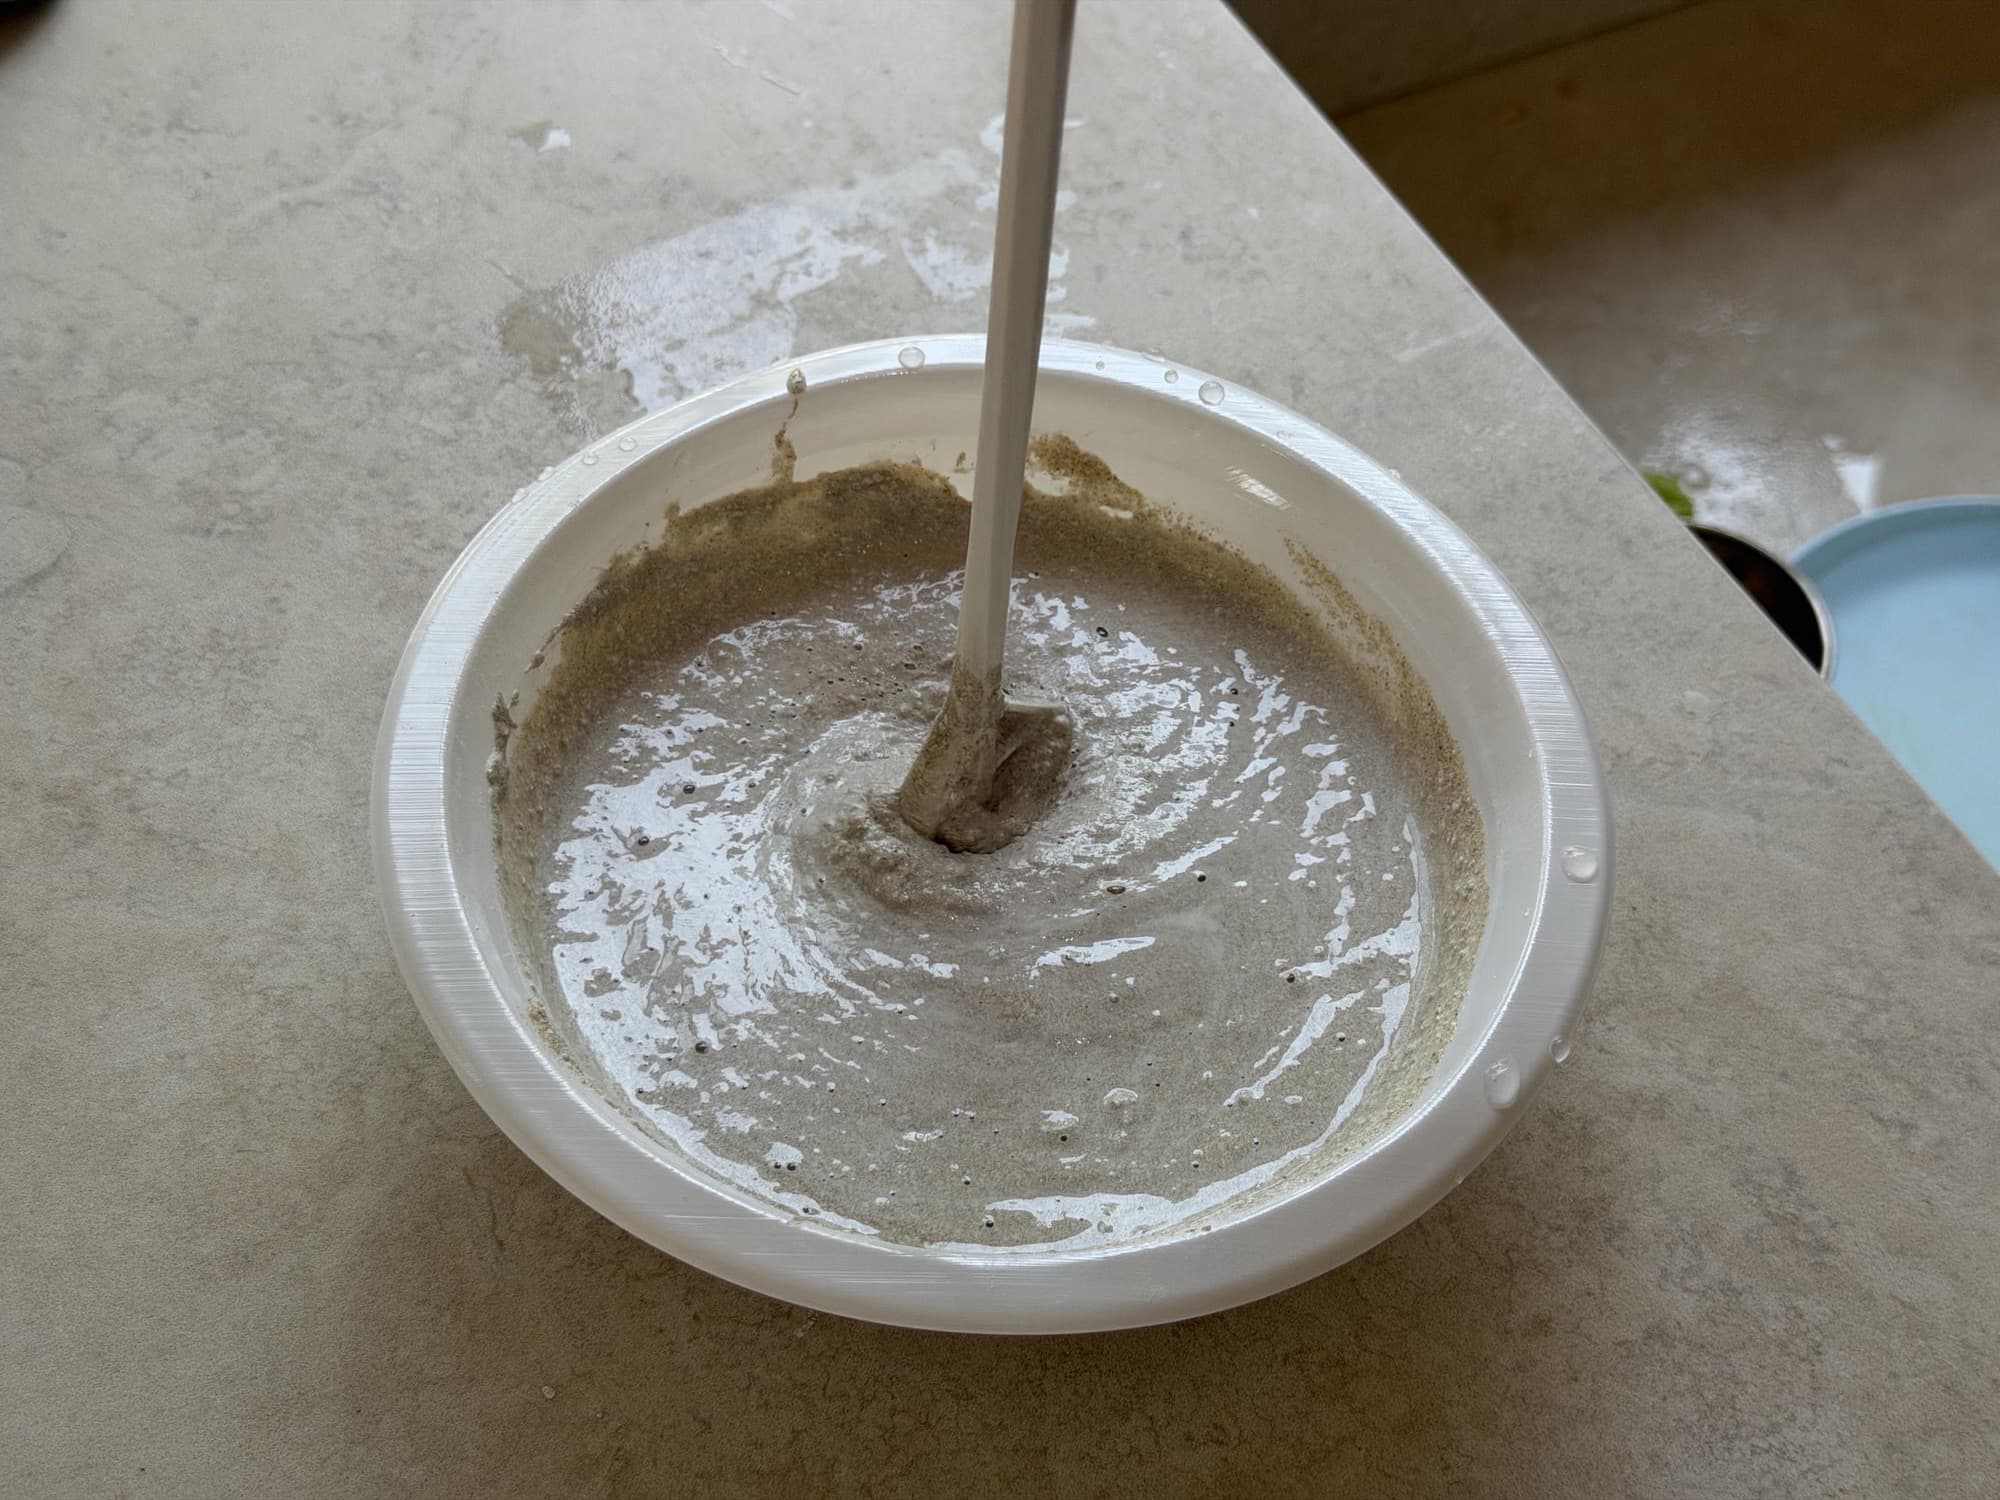
Mixing concrete in a shallow bowl with the drill-powered paddle.
#Pour and consolidate
Add the mixture gradually so it can reach narrow areas without trapping large pockets of air. I tap the entire mold against the table to bring bubbles to the surface and settle the mixture around small details. This only works if the mold is held together strongly enough to withstand the impacts. Watch the seams and inserts throughout the pour. Stop if a joint begins to open or an insert starts to move.
Fill the mold to the intended level, remove excess concrete, and leave it on a stable, level surface. Protect it from being moved or disturbed while the concrete gains strength.
#Choose the right time to demold
Concrete may feel hard after about four hours, but do not be tempted to demold it that early. My first pour could hold its shape after only a few hours but still had very little strength, especially in thin sections. Parts of the mold released easily, while other areas were stuck strongly enough that the force required to remove them destroyed the young concrete.
I have found that waiting 24 hours before demolding is much safer. The extra time can make the mold a little harder to clean, but the strength gained is worth it. Exact timing still depends on the mixture, temperature, humidity, shape, and mold design, so follow the manufacturer's instructions. If a part requires significant force, stop rather than risking the casting.
More importantly, do not design a mold that depends on force to demold. A well-designed mold should separate in a predictable sequence. Remove clips and fasteners, open the outer pieces one at a time, and support fragile areas as they are exposed.
#Post-processing
#Cure the concrete
Demolding is not the end of curing. Concrete continues to gain strength after it leaves the mold, so keep it from drying too quickly and follow the curing instructions for the specific mix. Handle thin sections carefully until the piece has developed enough strength for finishing. I wash the concrete with water once or twice a day for the first two or three days to keep its surface moist while it cures.
#Sand and refine the surface
I prefer to sand only the raised lines where concrete entered the mold seams. Coarse sandpaper can quickly remove the smooth outer layer and expose the sand below it, leaving a surface that looks and feels rough. Start with a fine abrasive in an inconspicuous area and avoid aggressive sanding near thin edges and corners.
Wet sanding helps control dust. Wear suitable eye, skin, and respiratory protection, and do not dry-sand concrete without proper dust extraction. Concrete dust contains respirable silica and should not be inhaled.
#Consider a cement slurry coat
Another technique for smoothing small pores and surface imperfections is to mix cement with enough water to form a thin slurry, then brush or rub it onto the finished casting. Work it into the surface, remove the excess before it sets, and cure the new coat according to the cement manufacturer's guidance. A slurry can change the color and texture, so test it on a sample first.
I have not tested this method myself, but I have seen other concrete makers use it successfully. Treat it as an optional finishing technique rather than a substitute for careful mold preparation and curing.
#Apply a sealer
Once the concrete has cured and dried as required by the product, apply a sealer that suits the object's intended use. A sealer can reduce staining, limit water absorption, and change the sheen or color of the concrete.
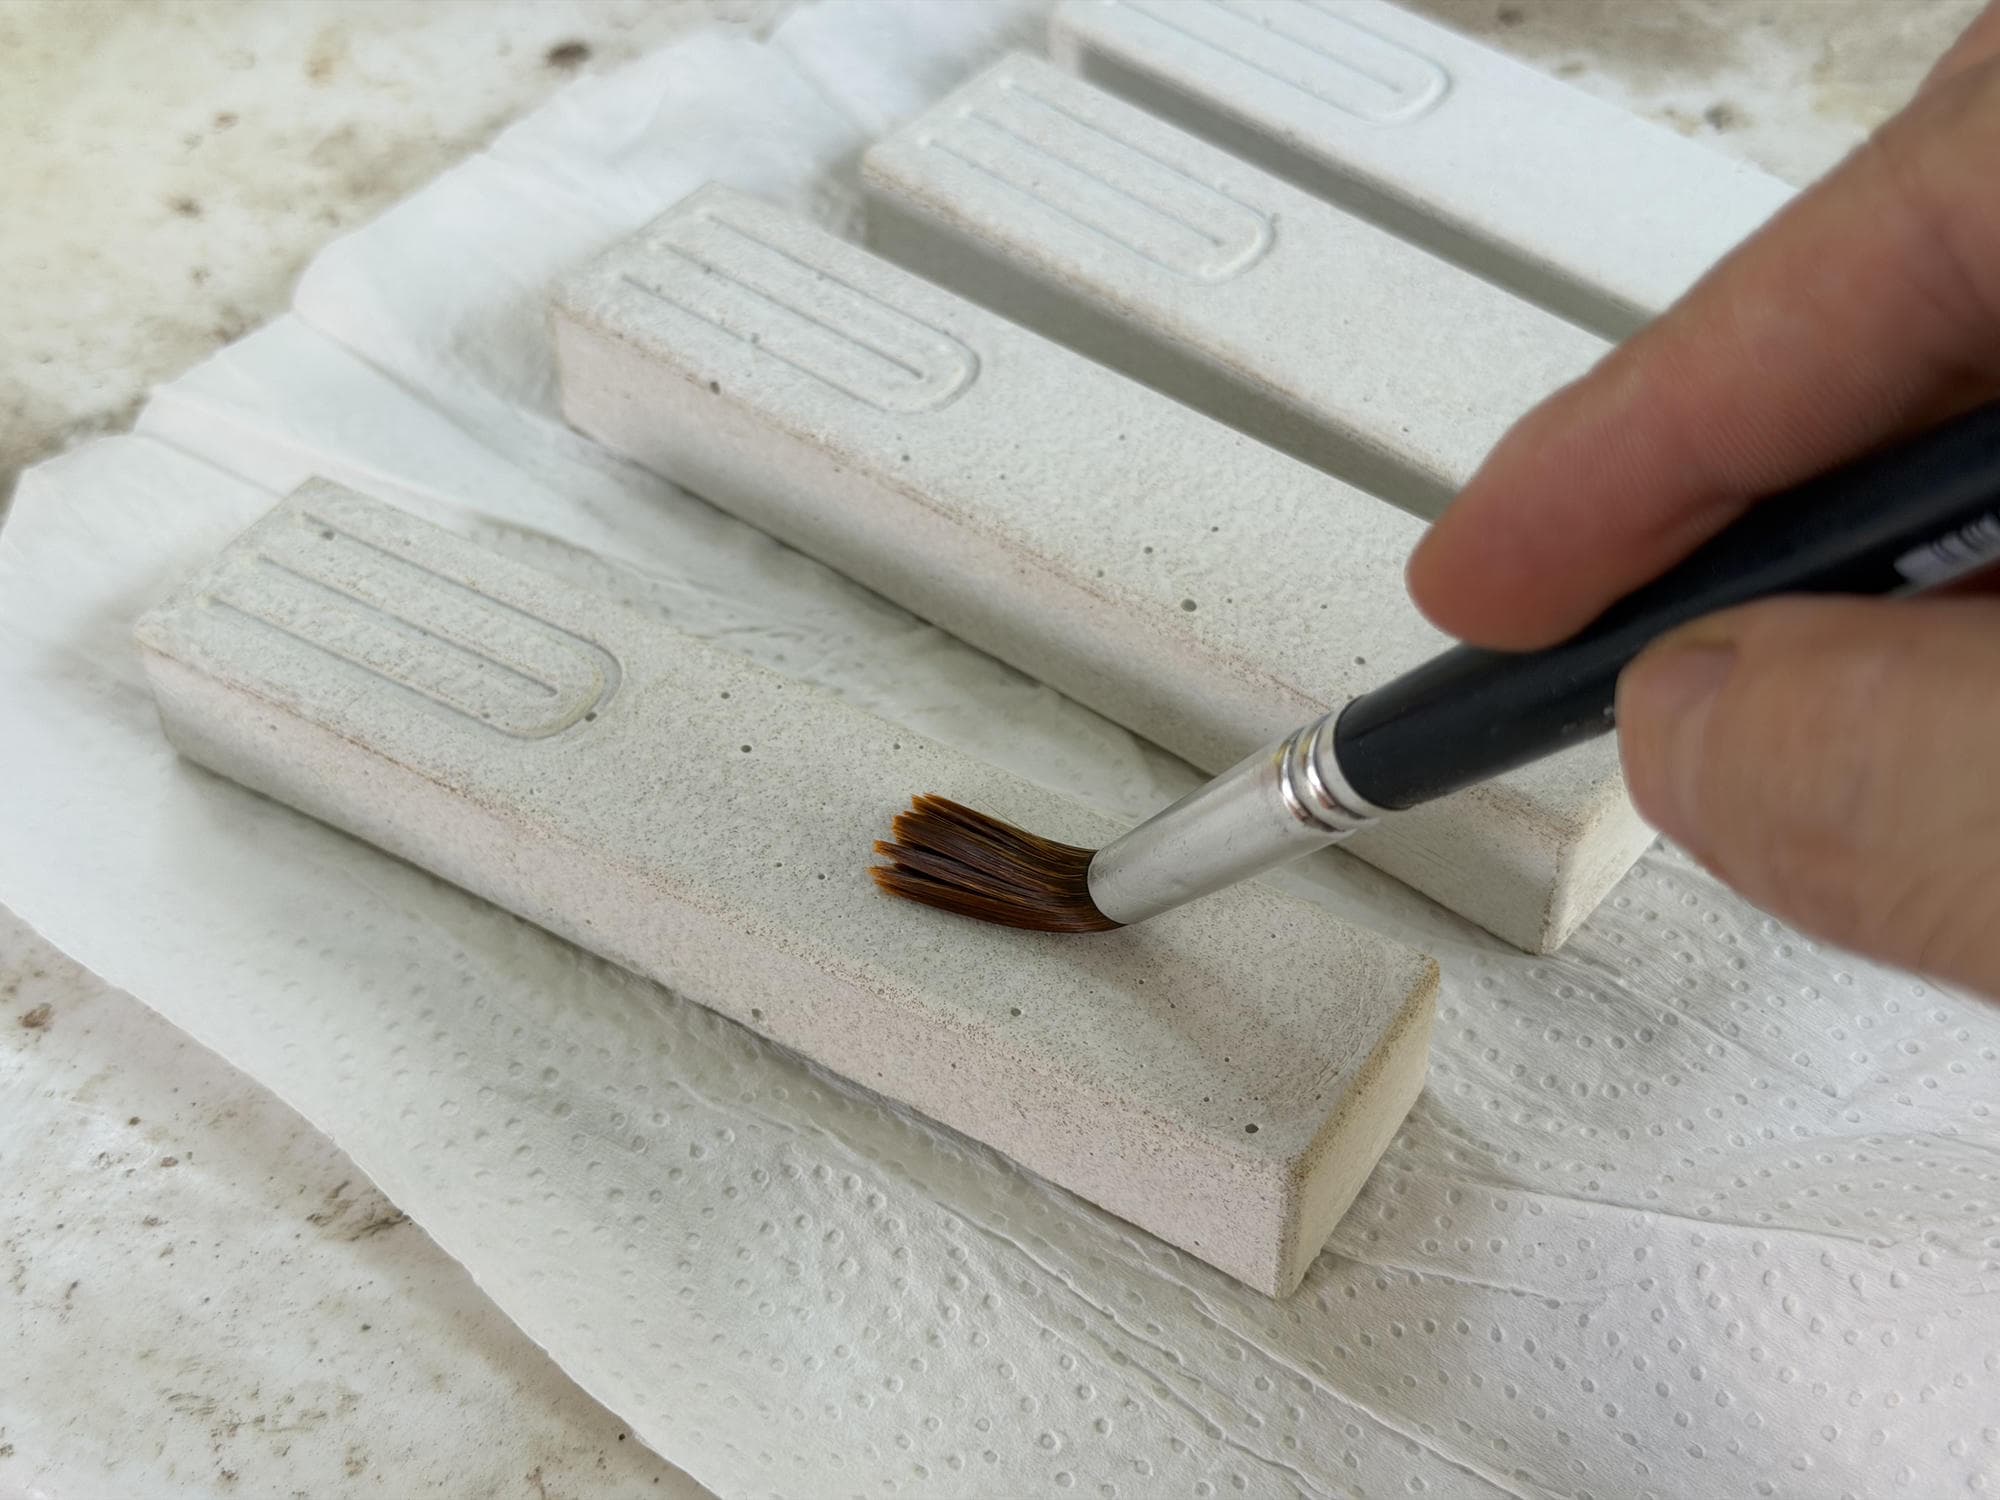
Applying a thin coat of sealer to finished concrete mezuzah cases with a small brush.
Test it on a hidden area or a sample made from the same mix. Apply thin, even coats according to the manufacturer's directions, and allow each coat to dry fully before handling the piece.
The best results come from treating molding as one continuous process. Design the concrete shape, mold assembly, pour, and removal sequence together. If the mold can be aligned securely and taken apart gently, every step that follows becomes easier.